Category Archive: Third Year

Procedure Notes: Thoracentesis

Thoracentesis

Date: <____>
Time: <____>
Indication: Large pleural effusion
Resident: <____>
Attending: <____>

A time-out was completed verifying correct patient, procedure, site, positioning, and special equipment if applicable. The patient’s <right/left> side was prepped and draped in a sterile manner after the appropriate infiltration level was confirmed by ultrasound. 1% lidocaine was used anesthetize the surrounding skin. A finder needle was then used to locate fluid and clear yellow fluid was obtained. A 10-blade scalpel used to make the incision. The thoracentesis catheter was then threaded without difficulty. The patient had <?mL> of clear yellow fluid removed. <Attending/Resident> was present for the entire procedure. A post-procedure chest x-ray was ordered and the fluid will be sent for several studies.

Estimated Blood Loss: <____>
The patient tolerated the procedure well and there were no complications.

Other procedure note examples:

Also, thank you to my two favorite websites for helping me write notes in the hospital:

Procedure Notes: Swan-Ganz Catheter

Swan-Ganz Catheter Placement

Date: <____>
Time: <____>
Indication: Hemodynamic monitoring/Intravenous access
Resident: <____>
Attending: <____>

A time-out was completed verifying correct patient, procedure, site, positioning, and special equipment if applicable. The patient was placed in a dependent position appropriate for central line placement based on the vein already cannulated with a 9F Cordis catheter. The patient’s <right/left>  <shoulder/neck/groin> was prepped and draped in sterile fashion. A triple lumen continuous cardiac output Swan-Ganz catheter was brought onto the field and each line flushed with sterile saline and the SVO2 sensor calibrated. The catheter was introduced into the Cordis catheter to a distance of 15-17 cm. The balloon was then inflated and the catheter was advanced through the right ventricle and into the pulmonary artery until a wedge position pressure tracing was obtained. The balloon was then deflated and verification of return of a pulmonary artery pressure tracing made. During the floating procedure to position the catheter the position of the catheter tip was determined by continuous pressure monitoring via the distal port. The catheter was locked to the Cordis with the tip inserted to a distance of <?cm> and a sterile dressing applied. <Attending/Resident> was present for the entire procedure.

Estimated Blood Loss: <____>
The patient tolerated the procedure well and there were no complications.

Other procedure note examples:

Also, thank you to my two favorite websites for helping me write notes in the hospital:

Procedure Notes: Endotracheal Intubation

Endotracheal Intubation

Date: <____>
Time: <____>
Indication: Respiratory Distress
Resident: <____>
Attending: <____>

A time-out was completed verifying correct patient, procedure, site, positioning, and special equipment if applicable. The patient was placed in a flat position. Sedation was obtained using <Versed 3mg>, and additionally with <Etomidate 20mg>. The patient was easily ventilated using an ambu bag. The <GLIDESCOPE TECHNOLOGY/ MAC 3 BLADE> was used and inserted into the oropharynx at which time there was a Grade 1 view of the vocal cords. A 7.5-french endotracheal tube was inserted and visualized going through the vocal cords. The stylette was removed. Colorimetric change was visualized on the CO2 meter. Breath sounds were heard in both lung fields equally. The endotracheal tube was placed at 23 cm, measured at the teeth. <Attending/Resident> was present for the entire procedure.

A chest x-ray was ordered to assess for pneumothorax and verify endotrachealtube placement.

Estimated Blood Loss: <____>
The patient tolerated the procedure well and there were no complications.

Other procedure note examples:

Also, thank you to my two favorite websites for helping me write notes in the hospital:

Procedure Notes: Thoracostomy (Chest Tube)

THORACOSTOMY (CHEST TUBE) PLACEMENT

Date: <____>
Time: <____>
Indication: Pneumothorax/Hemothorax
Resident: <____>
Attending: <____>

A time-out was completed verifying correct patient, procedure, site, positioning, and special equipment if applicable. The patient was positioned appropriately for chest tube placement. The patient’s <right/left> chest was prepped and draped in sterile fashion. 1% Lidocaine was used to anesthetize the surrounding skin area. A <2 cm> skin incision was made in the mid-axillary line at the inframammarycrease. Utilizing blunt dissection a subcutaneous tunnel was created cephalad just adjacent to the superior rib. The pleural space was entered bluntly and gush of  <air/blood> was observed. A finger was inserted into the pleural space to check for anatomy and guide tube insertion. A <36F/40F> thoracostomy tube was inserted using a Kelly clamp and positioned appropriately. The chest tube was sutured securely to the skin and a sterile dressing applied. A pleurevac was attached to the chest tube and a chest x-ray obtained. <Attending/Resident> was present for the entire procedure.

Estimated Blood Loss: <____>
The patient tolerated the procedure well and there were no complications.

Other procedure note examples:

Also, thank you to my two favorite websites for helping me write notes in the hospital:

Procedure Notes: Arterial Line

ARTERIAL LINE (A-Line) PLACEMENT

Date: <____>
Time: <____>
Indication: Hemodynamic monitoring
Resident: <____>
Attending: <____>

A time-out was completed verifying correct patient, procedure, site, positioning, and special equipment if applicable. Allen’s test was performed to ensure adequate perfusion. The patient’s <right/left> wrist was prepped and draped in sterile fashion. 1% Lidocaine was used to anesthetize the area. A <18G/20G> Arrow arterial line was introduced into the <radial/femoral> artery. The catheter was threaded over the guide wire and the needle was removed with appropriate pulsatile blood return. The catheter was then sutured in place to the skin and a sterile dressing applied. Perfusion to the extremity distal to the point of catheter insertion was checked and found to be adequate. <Attending/Resident> was present for the entire procedure.

Estimated Blood Loss: <____>
The patient tolerated the procedure well and there were no complications.

Other procedure note examples:

Also, thank you to my two favorite websites for helping me write notes in the hospital:

The Best Free Software For Students

If you are anything like me, you will do anything to avoid paying thousands of dollars for the next Adobe product.  After ten years of higher education (and at least 4 to go!) I have tested hundreds of software packages; in this post I will list the best free and open source programs I have found.  Learn to love open source software…and you will soon learn how to spend those thousands of dollars you saved!  My software list will certainly not be a comprehensive list of all the great open source programs. For a complete list of free software programs I have three recommendations.

  • The best resource is sourceforge.net which is a nearly complete collection of all reputable free software.
  • FileHippo.com is a free website that lists hundreds of free software packages by category
  • schoolforge.net is a compilation of hundreds of free and open source software programs that is easily searchable.


WEB BROWSER

Google Chrome is a no-nonsense, super fast web browser.  Here is just one reference proving Chrome's speed superiority (from cnet.com). For mac users, Safari is a distant second.  While I used to enjoy Firefox, it takes nearly twice as long to load web pages than Chrome.  We all know how terrible Internet Explorer is.


WORD PROCESSING, PRESENTATIONS, SPREADSHEETS

OpenOffice is a well known counterpart to Microsoft Office.  The free software includes a fully capable word processor, a presentation organizer, and a fully loaded spreadsheet tool.  In essence, you get Word, PowerPoint, and Excel for free.  An added bonus, you can save any file in OpenOffice format OR in the corresponding Microsoft format so there will never be compatibility issues.


CALENDAR

My love for Google products will now show through.  Google Calendar is simple and highly effective.  You can merge nearly all online calendars into your Google calendar account. You can send yourself reminders using email, phone call, or text message. You can list recurring events in any imaginable patter (e.g. same date each year, 2nd Saturday of March each year, etc.)


IMAGE MANIPULATION / GRAPHIC EDITOR

1. Gimp is a professional image editor with a student's pricetag.  This free program comes with nearly all the bells and whistles you would find in the newest version of Adobe Photoshop.  The user interface is not idea and takes some getting used to. However, with a price tag of $0 this is a great piece of software.


2. I have heard great things about Paint.Net.  I must admit, I have never used it because I have spent so much time using Gimp that I don't need anything else.  However, it is worth a try if you are looking for more free graphic editing options.


AUDIO EDITOR

Audacity is a free, open-source program that facilitates the recording and editing of all audio and sound files.  I often use it to make my own 'radio edited' song versions.


PDF READER AND WRITER

Foxit Reader is far better than the free Adobe Reader. It requires far less resources when it is running on your computer, and it provides free mark-up tools including text editing, highlighting, commenting, and basic geometric shapes.


PDF CREATOR / CONVERTER

CutePDF Writer is the free version of CutePDFs vast line of products. The free writer allows you to convert any image, document, or screen shot to a PDF.  I use this product all the time. I save documents as PDFs and place them on my thumb drive rather than printing everything out.


ANTIVIRUS SOFTWARE

There are actually quite a few free antivirus options out there. Many of the web giants (Google, Yahoo, MSN, etc) have their own free antivirus software. My personal favorite is Avast!, which the program that comes with GooglePak.  Just be sure you click on the FREE version, as they have other options.


PERSONAL FINANCE

Mint.com allows users to track all bank accounts, credit cards, loans, and investments in one place. The software is similar to costly software like Quicken, but is free and is web-based: which means you can check your information on any computer, any time.


BIBLIOGRAPHY, CITATIONS, REFERENCE MANGER

The best resource in this category, I must admit, is not free. EndNote is a must-have resource for research and reports. It is user friendly and will save you hours of time by automatically plugging in your references and bibliography. There are a number of free programs that try to mimic EndNote's features. Some are good, but after trying them I ended up purchasing a student edition of EndNote because it is so much better.  Here is a list of free bibliography and reference managers. Or you can check out the wikipedia page which compares all reference managers, free and non-free.


STATISTICAL ANALYSIS

R (The R Project for Statistical Computation) is a free text-based statistical computational software program.  It is not for the feint-hearted. The learning curve is steep, but once mastered, this free software provides all the tools to run any statistical analysis, graph, or plot.


LaTeX EDITOR

Not all LaTeX editors are created equal.  WinEdt is a clean editor without the frills of other programs. I have used this software for 5 years and I have never had even one problem (something that can NOT be said about most LaTeX editors!)  The free version will frequently ask the operator to purchase the full version, but it is never required.


BRAINSTORMING AND MIND MAPPING

XMind assists individuals and teams in keeping track of ideas and goals. If you have never used mind-mapping software, you need to start. XMind creates the prettiest visual map, but there are other options that work just as well. FreeMind is another great one.


Did I forget something? If you know of more great, open source software please leave a comment.

Conversion Disorder vs Factitious Disorder vs Malingering

Conversion disorder, factitious disorder, and malingering have one major characteristic in common: they represent conditions that are not ‘real’.  However, ‘real’ is a vague word and it is important to understand the differences between these conditions.  Properly diagnosing your patient with one of these psychiatric ailments will allow you to create appropriate plans of care for your patients.

1. Conversion Disorder: is a psychiatric condition that results in a neurological complaint or symptom, without any underlying neurological cause.  Patient’s may experience seizures (i.e. ‘pseudoseizures’), weakness, non-responsiveness, numbness, and even vision loss.  The symptoms are not intentional, the patient is not faking or intentionally creating his/her complaints, yet upon further investigation no biological explanation for the symptoms can be found.  The symptoms, therefore, are ‘real’ to the patient but are not caused by any ‘real’ pathology.  The current thought is that the symptoms are somehow caused by an overload of emotional stress in the body. The name “conversion disorder” comes from Sigmund Freud who stated that stress can cause a psychiatric ailment to ‘convert’ to a medical problem.  Do not fall into the trap, however, of many students/doctors/nurses who say the patient is ‘faking’.  While you may know that a patient complaining of sudden vision loss has a completely healthy eye without disease, the patient’s eye and brain are actually NOT processing any sight.  Alternatively, a case that I have seen a number of times, a patient with syncope from conversion disorder whose labs, tests, vital signs, and clinical status are completely normal will actually NOT respond to painful stimuli (sternal rub, nail bed pressure, supraorbital pressure) during an episode.  It is important to remember the unintentional nature of conversion disorder when discussing the condition with a patient.  To them it is REAL, even if to you it seems fake.

Studying for the Psychiatry Rotation?  Check out First Aid for the Psychiatry Clerkship

2. Factitious Disorder (a Somatoform Disorder): is a condition where patients intentionally fake disease, or intentionally cause disease in order to play the ‘patient role’.  The main distinction between this and conversion disorder is the intentional nature of factitious disorder. Often referred to a Munchausen Syndrome, factitious disorder is characterized by patients frequently feigning illness to obtain attention, sympathy, or other emotional feedback.  They achieve this goal through exaggerating symptoms, deliberately faking symptoms, or even intentionally creating real symptoms.  Patients have been known to contaminate their own body fluids, even injecting themselves with dirt, bacteria, or fecal matter in order to create illness that will then lead to primary emotional gain. A related disorder is known as Munchausen by Proxy, which is characterized by a person intentionally faking or causing illness in another (usually a child) in order to obtain the same emotional feedback.  Victims of Munchausen by Proxy are often children who return to the hospital time and time again with infections or other ‘ailments’ that are either fabricated or intentionally created by their caregiver.

3. Malingering: is the intentional faking or creating of illness in order to obtain secondary gain (e.g. workers compensation, disability payments, avoiding work or jail time, pain medication, etc.) Malingering is NOT a psychiatric illness; this is the first major distinction from the other two disorders. Malingering is an intentional abuse of the medical system to obtain personal benefit.  The difference between malingering and factitious disorder is the goal of the patient; malingerers abuse the system to obtain secondary gain while patients with factitious disorder attempt only to obtain emotional, or primary gain.  In simpler terms, the end goal of a malingerer usually involves monetary value, while the goals of patients with factitious disorder have no such value.

QUICK REVIEW:

  • Conversion Disorder: Unintentional, due to emotional stressors, no ‘gain’ to the patient
  • Factitious Disorder (Munchausen): Intentional, primary or ’emotional’ gain
  • Malingering: Intentional, secondary and often monetary gain


How to instrument tie: A video tutorial

jpatrick.net

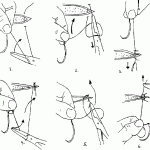
In recent posts I highlighted some great training videos on suturing and on one and two handed knot tying. In this post I will recommend a video tutorial for instrument tying.  As with the other suturing and knot tying skills, it is very important that medical students learn early in their careers how to instrument tie.  This is the bread and butter of knot tying.  If you are proficient with the instrument tie you will impress residents and attendings and they will be much more willing to give you responsibilities in the OR.  The video below is a straight forward review and tutorial of the instrument tie.  As with all other knots, remember that a square knot is not complete until you have made two opposing throws; otherwise you are tying granny knots.

One and two handed surgical knot tying: A video tutorial

In two recent posts I recommended some great video tutorials for suturing and for instrument tying.  This post will focus on learning how to tie one and two handed knots in the operating room.  As with previous skills, it is very important that medical students learn to tie surgical knots early in their training.  Let me offer one experience from medical school to illustrate this fact.  This is a true story.

After finishing rounds with the residents on my OB rotation I was assigned to work in the OR with the chief of benign gynecology surgery at a community hospital.  He also happened to be the rotation coordinator and was responsible for my grade and evaluation.  The first case was an open tubal ligation. As the case was ending the attending turned to me and said, “hey, we have to close the fascia, can you tie knots?”  Luckily, I knew quite well how to tie.  I picked up the suture and threw a few two handed knots down.  My attending was seriously impressed and told everyone on the team.  He gave me a raving evaluation and spoke specifically about how I was “well prepared for the OR.” So, take it from me, learn these knots! Always remember Rule #1: tie square knots, not granny knots! Two throws are required to complete the knot. 

1. The two handed knot.  This is the knot that you will actually use in the OR. Most surgeons never tie one-handed knots and some even forbid them.  So, this should be your bread and butter. After watching a few tutorial videos I am convinced that this is the best.  It comes from the University of Texas at Houston and walks you through the basics. The audio is very good, so find some earphones. Always remember that a square not requires two throws to be completed.

2. The one handed knot: This is a more confusing knot and far less high yield because very few surgeons ever use it or expect it.  It is notoriously difficult to teach and to learn.  The best video I have found is shown below.  Unlike the previous video, there is not audio to walk you through the knot.  Rather, the knot is completed slowly and each difficult section is repeated.  Remember, you must tie two throws to make a complete square knot. This is important when tying a one handed knot because the two throws are completed using two different techniques.

Finally, there is more than one way to tie a square knot.  Here is one more video that demonstrates the two handed and one handed method clearly. Similar to the second video, there is no audio.  Go get some gloves and some suture and practice along with this video.

How to suture a wound: A video tutorial

Before you start your third year of medical school you absolutely need to know how to suture.  In this post I will provide some of the best video tutorials for suturing. (See my other posts to review one and two hand surgical knots and instrument tying.) During my general surgery rotation and OB/GYN countless attendings and residents would look at me as the case was ending and say, “hey med student, can you suture?  Will you close while I dictate?”  I was also asked to suture quite a few lacerations during my ED rotation.  Learn early and learn often.  Your school will likely have a suturing training course, but you need to keep fresh.  I recommend the two videos listed below as tutorials.  The first (not youtube, so you have to click on it) is the most professional and has some images to help understand the mechanics.

Video 1: From medicanalife.com

Video 2:


It is also very important to know a few common pimping questions (below).  The Medscape website offers a very good and very free review of all of these questions.

  1. The indications for suturing vs. glue vs. healing by secondary intention
  2. Time to removal of stitches
  3. Types of suture, and when to use each
  4. How and when to use lidocaine and/or epinephrine prior to suturing
  5. Lethal dose of lidocaine (I have been pimped on this at least 10 times)
Let me emphasis one last time.  Learn to suture, and learn well.  During my surgery rotations I was asked on the spot to sew up a panniculectomy, countless skin grafts, and some other major wounds. The residents and attendings would have never asked for my help if I did not first impress them with my suturing ability.

Older posts «

» Newer posts